Tassel Pendant Tutorial
 Tassel pendants are fun to create, and if you don’t know how to make one, this tutorial is for you! They are quick and easy, so if you need something to wear and you only have 15 or 20 minutes in which to make it, you’ll enjoy this project.
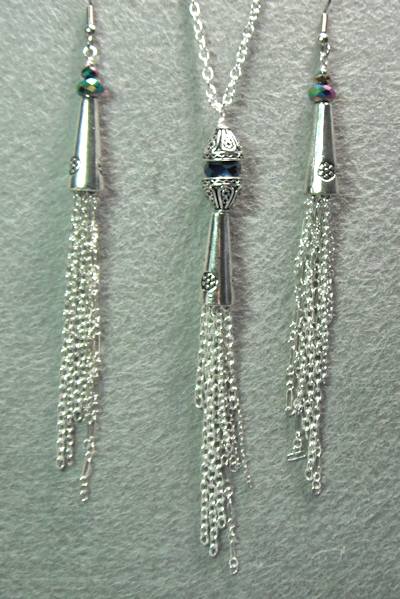
This video tutorial demonstrates how to make the pendant that you see on the right. You can use the same technique to make earrings, too!
Tassels Have Movement
One of the fun properties of tassel jewelry is that it moves! The movement catches the light and adds a great deal of interest.
Tassels can also be used in various ways. You can take the information in the video and use it to create jewelry of all kinds, as well as decoration around the house! Think of fan pulls, swags for drapes…all kinds of things.
Mix it Up!
I’ve demonstrated using silver colored metal, but you can use any colors you wish. Silver, gold, copper, brass, gunmetal…the list goes on and on. You can mix metals as well for an even different look!
 Tassel Tutorial
So, here is what you will need for the pendant in the tutorial:
- One bead cone
- Two bead caps
- One fire-polished rondel bead, 8mm.
- Approximately 24 inches of chain, cut into pieces between 1 inch and 3 inches long each.
- Piece of wire, 22 gauge, about 3 to 4 inches.
- Necklace chain to use for hanging the tassel pendant around your neck.
(If you want to make the silver earrings, you need 2 cones, 4 fire polished beads (two of each, 6mm and 3mm), 2 pieces of wire, double the chain and two earring findings.)
When you’re done, you can check out some of my other tutorials, like the memory wire bracelet, quick dangle earrings or how to make wrapped loops and eyepins. You can check out the projects page, too, if you want to try your hand at some intermediate and advanced beadwork projects.
How to Make a Memory Wire Bracelet – Video Tutorial
 Here’s a video tutorial for making a memory wire bracelet. I love “instant gratification” projects, and this style of jewelry fits the bill nicely! It’s quick, easy and fun, and also requires few tools.
What is Memory Wire?
Memory wire is called such because it’s a hard wire that retains its shape very well. Typically it’s made from steel of some type and has lots of spring to it.
Because it’s a hard, springy wire, it doesn’t deform easily. This means threethings:
- It won’t collapse on your wrist.
- It’s harder to manipulate to make end loops.
- To cut the wire, you need a wire cutter specially made doe cutting memory wire.
However, it doesn’t mean you can’t make end loops; only that you have to put a little more effort into it to close the loop. (But the good news is that you only need to make simple loops, and don’t have to wrap the ends on the bracelet.)
I want to emphasize that you really do need a pair of wire cutters that is designed to be used with memory wire. This stuff is really hard, and I guarantee you will damage your regular wire cutters if you try them. (Yes, I disregarded the warning the first time…and yes, I trashed that pair of wire cutters.)
Memory Wire Video Tutorial – How to Make a Bracelet
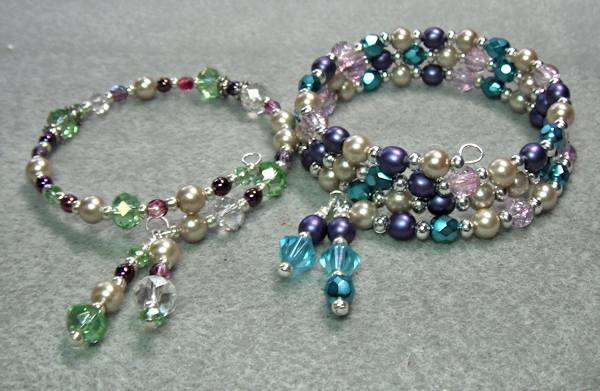
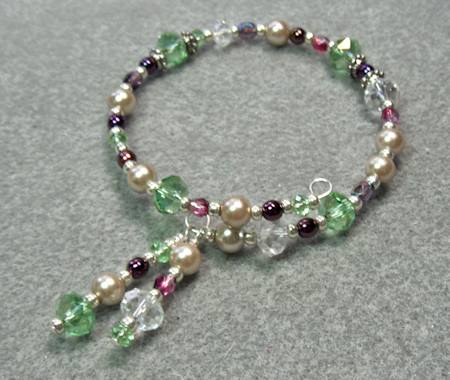
 In order to make the bracelet you see to your left, you will need the following supplies:
- Memory wire in a bracelet size. (It comes in a package of between 25 and 100 “rounds”, and there are two sizes for bracelets, small and large — choose whatever is best for you.)
- A selection of beads in various sizes. In the example I have fire polished beads of different shapes, crystal pearls and some Czech round beads.
- Size 8 seed beads, your choice of color. I used a permanently galvanized silver color.
- Memory wire cutter.
- Pair or round nose pliers.
Note:Â If you want to make the dangles, you’ll also need two headpins (2 or 3 inches) and perhaps another pair of flat or chain nose pliers for the wrapped loops on the headpins.
Update: One of my readers mentioned something that I should have talked about in the video, so I wanted to make a quick note. When you’re making the wrap bracelet, it’s best to make your wrap at least 1.5 times around your wrist, for security. I used very lightweight beads in my demo, but if you use heavier beads, please think of cutting the memory wire so that it wraps at least twice. (Thanks, Maria!)
And remember to check out some related tutorials! They include the wrapped loops, simple loop bracelet tutorials. (And of course don’t forget the projects page for more advanced work.)
Enjoy! 🙂
Bead Embroidery Bracelet – “Gypsy’s Silk”
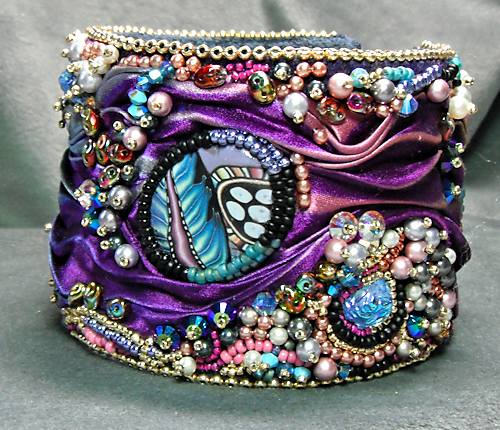
 Every time I take a bead embroidery class, I come away full of new ideas. A couple of weeks ago I took a couple of classes with Sherry Serafini (who, by the way, is as awesome a teacher as she is a beader), and this is the result of one of the classes. I call this bead embroidery bracelet “Gypsy’s Silk”.
A Different Look
You’ll notice that this is a little different from most bead embroidery; it’s closer to being mixed media. Then again, bead embroidery really is mixed media in a way, since you are beading on some type of fabric or backing.
The difference with this is that silk is being used as part of the bracelet. It’s a type called Shibori, and it’s gorgeous! I am not sure if the silk is pleated, then dyed, or dyed before pleating. Either way, it’s beautiful, as well as intriguing to work with.
So, I have to give Sherry the credit for thinking up this beautiful new style of bead embroidery. But it’s also given me ideas for taking this a step in a different direction. Which means that I have a whole slew of new projects percolating for my upcoming “Bead Embroidery Components 2” tutorial.
Where’s the Shibori Silk?
While the Shibori silk ribbon in the bracelet above I bought from Sherry (I fell in love with the colors), I had also bought some online from Etsy (one of my favorite places) that was a bit more muted. But at the class, I discovered that one of my classmates also sold Shibori ribbon, so click here for her site – she has absolutely gorgeous colors too. (And no, I don’t get a commission for recommending her — I just saw with my own eyes what she had with her, so I know it’s wonderful.)
Big and Beautiful (If I Say So Myself)
This is a really wide cuff — a little over 2 inches. But it takes a surprisingly short time to complete. Of course, part of that is due to the fact that the ribbon takes up a fair amount of space that would normally be covered by beads. But, that was my idea — Sherry’s demo piece had less silk showing. But since I have never been one to color between the lines, I took my piece in a little different direction.
So that’s “Gypsy’s Silk”. I had a really hard time naming this piece, but it seems to fit. Well, I think so at any rate. So, off to the races (so to speak) and I’ll start getting together my next Bead Embroidery Components 2 tutorial — and it will be far more “bling-y” than Intro to Bead Embroidery Components.
So, hope you like this piece, and see you later! 🙂