Beadweaving Earrings Tutorial #1
One thing I love about beadweaving is that it tends to be very quick to work. And beadweaving earrings are especially fast! And although I love bead embroidery, there are times when it’s so soothing to get into the rhythm of weaving with beads.
So with that in mind, here’s tutorial number one for my earring beadweaving series.
Earrings Galore
I’ve worked on three designs for this tutorial. All three are based on the same idea, just worked in different ways to give different looks.
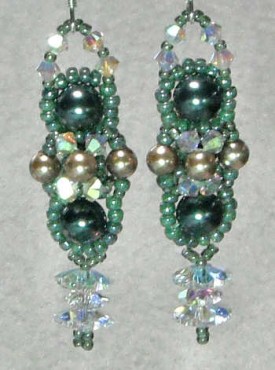
To the right you see the earring design I called “Double-Take”. This design is two-sided, with a different (but similar) pattern on each side. This makes sure that no matter how your earrings show, they show a neat design.
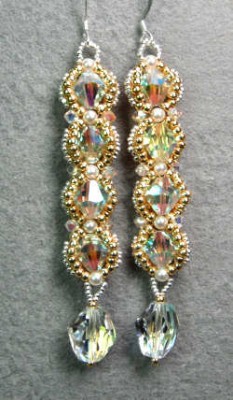
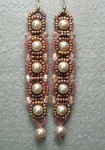
I also have two other designs in the tutorial; “Pearl Staircase” and “Cosmic Sparkle”. The “Pearl Staircase” is a little more on the casual side, while “Cosmic Sparkle’ is definitely Bling (with a capital B).
But the great part is that any of the earrings can be dressed up or down, based on the kinds of beads that you use.
 What You Will Learn
In the 25 pages of the Beadweaving Earrings1 tutorial, you’ll learn lots, including the following.
- Instructions for three earring patterns — “Pearl Staircase”,”Double-Take” and “Cosmic Sparkle”. Naturally, you’ll get a full supply list, including the seed bead color numbers.
- Creating a basic ladder stitch, as well as a modified ladder stitch.
- How to embellish the basic pattern.
- Ideas for alternate designs.
There are lots of up-close photos, so you can see exactly where your needle should be going, and how to accomplish the stitches. Although the instructions are easy to understand, there are times when a picture is worth a thousand words!
Getting the Tutorial
Your tutorial is delivered as an ebook, so it’s an immediate download. This means you can satisfy your “need to bead†at any time of day or night!
(Keep in mind that while you’re not getting a paperback copy in the mail, it also means that you don’t have to wait for the mailman — yay!) Also, because of the nature of this tutorial, there are no refunds. But I’ve tried my best to over-deliver for you!
The Beadweaving Earrings tutorial is just $5, and you’ll get detailed instructions (and photos!) for making the earrings “Pearl Staircase”, “Double-Take” and “Cosmic Sparkle”. And of course, you will get a full supply list.
So click the “Add to Cart†button below and you’re on your way to making your earring tutorial. It’s secure and you can safely pay with any major credit card. You’ll receive the download link in an email right after you place your order.
Bead Embroidery Earrings Tutorial — Tutorial #1
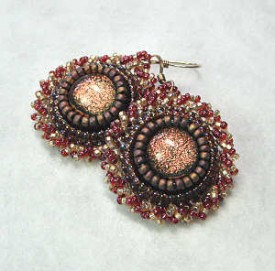 I’ve created this bead embroidery earrings tutorial because I can be an “instant gratification” junkie at times, and earrings can be very fast to make! They are also great if you’ve never done bead embroidery because they don’t require a lot of supplies that are used with this technique.
Plus, you can’t have too many earrings, right? 🙂
What You Will Learn
In the 38 pages of the Bead Embroidery Earrings1 tutorial, you’ll learn lots, including the following.
- Three earrings — “Emerald Eyes”, “Autumn Sun” and “Abby’s Bouquet”. Naturally, you’ll get a full supply list, including the seed bead color numbers.
- How to make a basic edging that looks really nice, plus variations to add in a “wow!” factor — you choose how much or little to add!
- Make earrings with both round and pear shaped cabochons, and a special consideration for the pear shape that you might not have thought of, when it comes to fringes.
- Bead embroidery stitches, along with some tips for making some of them easier and faster.
- A bonus project — a fringe variation on the “Abby’s Bouquet” earring set.
 There are lots and lots of photos for the steps — most are close-ups so you can see exactly where you need to put your needle!
 How to Get the Tutorial
Your tutorial is delivered as an ebook, so it’s an immediate download. This means you can satisfy your “need to bead†at any time of day or night!
(Keep in mind that while you’re not getting a paperback copy in the mail, it also means that you don’t have to wait for the mailman — yay!) Also, because of the nature of this tutorial, there are no refunds. But I’ve tried my best to over-deliver for you!
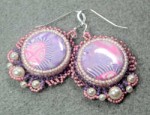 The Bead Embroidery Earrings tutorial is just $6, and you’ll get detailed instructions (and photos!) for making the earrings “Emerald Eyes”, “Autumn Sun” and “Abby’s Bouquet”. Plus a bonus variation on the fringe for “Abby’s Bouquet”. And of course, you will get a full supply list.
So click the “Add to Cart†button above and you’re on your way to making your bead embroidery earrings. It’s secure and you can safely pay with any major credit card. You’ll receive the download link in an email right after you place your order.
Wrapped Loop Earrings With Dangles Tutorial
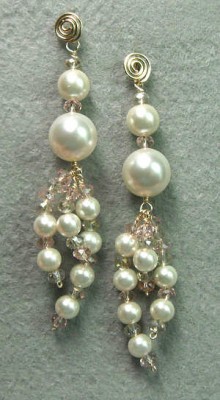 It’s time to do a wrapped loop earrings with dangles tutorial, as a follow-up to my Intro to Wrapped Loops video tutorial. If you don’t know how to do the wrapped loops or eyepins, check out the intro tutorial before trying this one.
But if you already know how to do these kinds of wire loops (or if you’ve just viewed the intro video), then now it’s time for making some earrings! In the video below, you will see that I make 2 pair — same technique, but different looks.
Ingredients (A.K.A. Supplies I Used)
For the first pair of earrings, I used the following supplies:
- Two 10mm crystal pearls
- Two 8mm crystal pearls
- Fourteen 6mm crystal pearls
- Six eyepins, red brass, about 3 inches (24 gauge)
- Two 5-inch piece of red brass wire, 24 gauge
- Eighteen light pink 4mm fire-polished rondells
- Sixteen light smoky topaz fire-polished rondells
- Pair of earring findings
- Pliers:Â round nose, chain nose
- Wire cutter
(I meant to list out all the supplies in the video itself, but I apparently deleted that clip by accident.)
 You’ll notice that I am using a fair amount of wire, and that I cut quite a bit off. Since I am using red brass (which is a darker gold than regular yellow brass), I don’t worry about how much I use. Red brass is pretty inexpensive.
However, if I was doing this in sterling silver or gold-filled wire, I would measure more closely so as to have as little waste as possible.
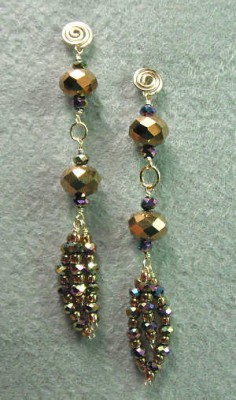
For the second pair of earrings (shown at the left), I used the following ingredients:
- Four 10mm dark bronze fire-polished rondells
- Thirty-two 3mm metallic peacock fire-polished rondells
- Size 8 seed beads, pink lustered gold
- Six red brass eyepins, approximately 3 inches each
- Four pieces of red brass wire, each about 4 inches
- Two jump rings, gold-plated brass, 5mm each
- Pair of earring findings
- Pliers:Â round nose, chain nose and bent-nose
- Wire cutter
Other Notes and Video Tutorial
You’ll notice that I am using eyepins for the dangles and not headpins. The reason for that is because I didn’t have any headpins in the right gauge! Since I didn’t want to run out to the store, I made my own eyepins.
But yes, you can certainly use headpins if you like. And you can use 22 gauge wire if you like; you’ll get the same basic effect.
I had a lot of fun with making these earrings, and the possibilities are pretty much endless. I like making the dimensional dangles (as I have come to think of them) because I don’t like the standard look where they splay out some. But naturally, if you don’t want to bend the dangles, that is entirely up to you!
All that being said, here’s the video — it’s a bit over 20 minutes, so you might want to get yourself a beverage and get comfortable, LOL.
And of course, if you enjoyed this video, feel free to like me on Facebook (or anywhere else…). 😉
