Intro to Tubular Herringbone Video Tutorial
If you want to learn tubular herringbone, I’ve got a video for you. :) And in fact, it’s a two for one, since you’ll see a mini-tut for flat herringbone (which is how I start the tubular).
What else? I show you some examples of tubular herringbone jewelry that I’ve made in the past, and I’ll list out some of the supplies I used for the projects.
Supplies for the Tubular Herringbone Demo
The supplies you’ll need (if you want to make exactly what I did in the demo are):
- Size 8 seed beads, opaque turquoise
- Size 8 seed beads, permanently galvanized gold
- Thread of your choice; I used One-G, but use what you like best
- Beading needle; I used a Tulip size 12, but you can use any beading needle, size 10, 11 or 12.
(I’ll list the supplies for the various projects in the next section.)
Supplies I Used for the Jewelry
Bracelet 1 (blue and topaz):  I used two sizes of Japanese seed beads. You may notice that the beads are more tubular than donut-shaped, and that is because I happen to use some inexpensive Japanese seed beads. I personally prefer (at least these days) to use the more donut-shaped seed beads.
For the bracelet, start with the size 11 blue beads. Make the tube 5 columns around and for 7 rounds high. Then change to using the size 8 topaz beads for three rounds. Then, change back to the size 11 seed beads. Repeat until the tube is as long as you like. Add the clasp of your choice.
Bracelet 2 (3 different sizes of seed beads): I did say I used three different sizes of seed beads, and this time I used some better-quality Japanese seed beads. Begin by creating a tube four columns wide by three rows high with size 11 seed beads. Then, do three rows of size 8 seed beads. Follow this with two rows of a size 6 and size 11 (stitched as a unit) and one row of size 6. Move back down to a size 8 for three rows, then back to three rows of size 11. Repeat until you have your project the length you want. Add the clasp of your choice.
Necklace: I used permanently galvanized size 11 seed beads by Toho. Miyuki also makes some permanently galvanized seed beads, called Duracoat. It’s important that you use permanently galvanized, because the ordinary galvanized will have the finish start to wear off before you complete the necklace!!!
The tube is 2 columns wide, which makes it very narrow — about 4 to 4.5 mm in diameter. The magnetic clasp I used was 5mm in diameter, which is ever so slightly wider. Then, you can add some large-hole beads. The easiest (if you want to make some) is to string together some 3 mm or 4 mm fire-polished beads, and run the needle and thread back through all the beads to make a circle slightly more than 5 mm in diameter.
 Tips for Tubular Herringbone
Herringbone in general tends to show the thread more than most other beading stitches. Try to match your thread color to your bead color as much as possible. If you are using several different colors, match to the dominant color.
If you find that you’ve created your tube too wide around and it collapses, you can either thread a piece of flexible cording through your piece to stabilize it, or your can take advantage of the collapse and make it into a rectangle shape. A third way to stabilize it is to sew some embellishments around the tube; it will tighten it up.
I hope you’ve enjoyed this tutorial!
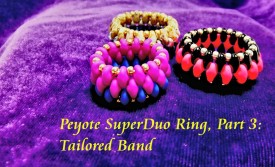
Peyote Ring Video Tutorial 3 – SuperDuos Again!
 Here’s the third free video tutorial for making peyote rings using SuperDuo beads. This time it’s a little different style from the other two, and it has a more traditional / classic look to it.
Whereas previously in video 1 and video 2 you had been constructing the ring vertically, this time you will do it horizontally. It’s a little trickier to start, but it’s still pretty easy — not to mention a whole lot of fun!
Why SuperDuo beads and not just regular seed beads? Mainly because I bought a ton of the 2-hole beads (SuperDuo, Rulla, Brick, etc.) and I wanted to be able to really use them!
The two-hole beads coming out of the Czech Republic have so many neat colors, and they also seem to be just right for using with peyote beading. Well, herringbone as well, if you watch my bracelet videos, LOL.
Video and Supplies
Supplies are the same as the last video — SuperDuo beads, size 11 seed beads, beading needle and beading thread.
You’ll need more SuperDuo beads this time, and less in the way of size 11 seed beads.
So, there you have it — three rings, all a bit different, but using SuperDuos. I hope that you have enjoyed the videos, and that they inspire you to create your own rings!
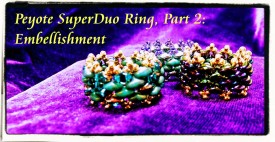
SuperDuo Peyote Video Tutorial – Ring Style 2
 You’ve probably seen my first SuperDuo peyote ring tutorial (here’s the link if you haven’t), and so now here is taking that original ring and doing some fun embellishment!
Why Embellish the Ring?
A couple of reasons. The first is because it’s pretty! The second is because if you made your initial ring a little too big, this embellishment will tighten up your ring a bit.
But also keep that in mind, if your first ring fits just fine. If that’s the case, why not just make a second ring and embellish it instead?!? 😀
After all, it’s great to have a variety of rings in different sizes and colors, right? And they are also kinda like potato chips — it’s hard to stop with just one ring. Well, that was what I found at any rate!
Supplies and Video Tutorial
As to supplies, you’ll need some:
- SuperDuo beads
- Beading needle (I used size 11)
- Beading thread (I typically use either Fireline or K-O)
- Some size 11 seed beads, in a coordinating or contrasting color.
Relax, put your feet up and I hope you enjoy the video! Don’t forget that this is video 2, and that there are three videos in the series. 🙂