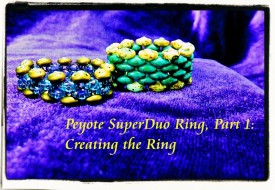
SuperDuo Ring – Peyote Video Tutorial – Ring Style 1
 Ever wanted to know how to make a peyote ring made with SuperDuo beads? If you said “You bet!” then you’re in the right spot. I have not only one but THREE FREE videos on using SuperDuo beads with the peyote beading stitch.
Tutorial 1:Â Flat Peyote
In this video, I teach you about making a ring with just a plain flat peyote. If you’re not familiar with SuperDuo beads, they are relatively recent, from the Czech Republic, and they have two holes (not just one).
This first video teaches you the most basic set of steps for making a ring. It’s easy and pretty fast, too. If you’re not familiar with using SuperDuo (or have never used them with peyote beading), then this is the perfect intro for you.
And finally — you don’t need a lot of beads in order to make the ring. That’s especially nice if you have some odds and ends from other projects, or you just don’t want to buy a lot to start out.
Video Below!
As far as supplies, you’ll need a beading needle (I used a size 11), beading thread and some SuperDuo beads. That’s it!
I hope you enjou this video. And remember, I have two more rings to suit your fancy (not to mention your fingers). 🙂
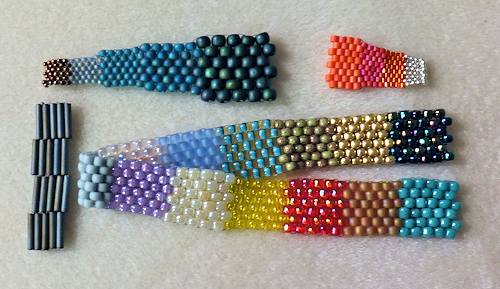
Seed Beads Reload – Video of Sizes and Colors
I’ve had a post previously about seed bead sizes and colors. This is an update, because seed beads are a moving target! In this post, we’ll talk a little more about seed beads, and a little further down, I have a video so you can perhaps better get an idea of some of the sizes and colors that are available.
I’ll also talk about the shapes of seed beads — traditional, cylinder, charlotte and bugle. (I’ll do a separate post on all the other neat shapes available these days.)
Seed Bead Shapes
First, you need to know shapes. Why you may ask? Glad you asked, because not all seed bead shapes are good for all bead weaving stitches. Let me rephrase that — some shapes are better than others for certain beading stitches. Each shape has their pros and cons, so let’s get started.
Traditional Round
These are your doughnut shaped beads. There are two main origins for these beads — Japan and the Czech Republic. In general, the Japanese beads are a bit more consistent in shape and hole size. They also come in far more colors. The Czech beads come in fewer colors and are more irrecgular. However, this is changing, because I am seeing some gorgeous multi-colored beads coming out of the Czech Republic.
Whenever you see “seed beads” in a supply list, unless specified differently, it generally means the traditional rounds.
The traditional round beads are good with any beading stitch. Keep in mind the variations of the individual beads — depending on your project, you may need to sort through your beads and take out the ones that are noticeably larger, smaller or more irregular.
Cylinder
These are usually known as “Delica” and are made by Miyuki in Japan. However, Toho (also Japan) makes a cylinder bead as well, called “Aiko”. They are both very regular in size and shape.
Cylinder beads are like teeny-tiny tubes. They also have a larger hole than do similarly-sized round beads. The cylinder beads are slightly smaller than the traditional round — a size 11 Delica or Aiko is more like a size 12 traditional round bead.
Best uses for cylinder beads are stitches like peyote, brick, ladder and square. They aren’t as good for herringbone or right angle weave.
Charlotte
The vast majority of the charlotte beads come from the Czech Republic, but Miyuki also makes some charlottes. This kind of seed bead is characterized by a single facet cut into one side of the bead. They are also typically irregular in shape…which makes them a great choice for organic looks!
Charlotte beads are typically very small — sizes 12, 13 and 15 – although I have rn across some size 8 charlottes. The holes are tiny in the beads coming out of the Czech Republic, and a slight bot larger in the Miyuki beads. Don’t expect to get all that many passes with a needle and thread through these seed beads.
You can use charlottes anywhere you use the traditional round beads, as long as you either use a very fine needle and thread, or use a stitch that doesn’t involve a lot of passes through the beads.
Bugle
Bugles have been around for quite awhile, and they have definitely evolved over time. These are cylinders to the max, so to speak — thin tube-shaped beads.
As for colors, don’t expect a huge range. You should find all the “usual colors”, but there are a lot of more specialized colors that aren’t available.
Bugles can be readily used in peyote, square, brick and ladder. Not so much the others, except for special effects.
Time for the Video
I’ve gone on quite a bit just on the different kinds of “regular” seed beads, so I won’t go into colors in this post. You’ll be able to see good examples in the video.
One kind of color finish I didn’t mention in the video is dyed. There are some absolutely gorgeous dyed colors in seed beads, but avoid them unless your piece will not be handled. And won’t get wet or sit in bright sunlight. Yes, the color wears off, and can bleed.
Although I say it in the video, it bears repeating — if you are buying galvanized beads, look for those marked as permanently galvanized (also sometimes called “permanent finish”). Don’t buy the regular ones –the beautiful metallic coating will rub off, probably the first time you wear your jewelry. Permanently galvanized beads hold up very well, though.
That’s it for now — stay tuned for the video on the myriad new shapes of seed beads — triangles, drops, cubes and the cool two-hole beads (to mention a few).
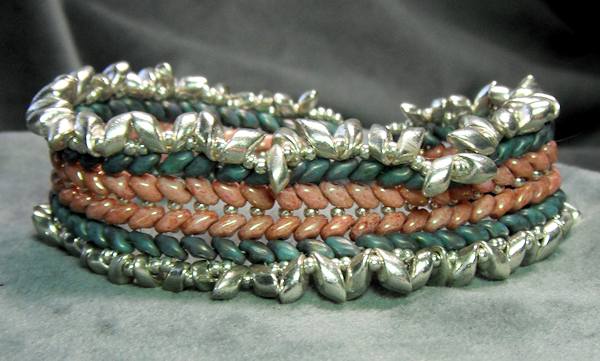
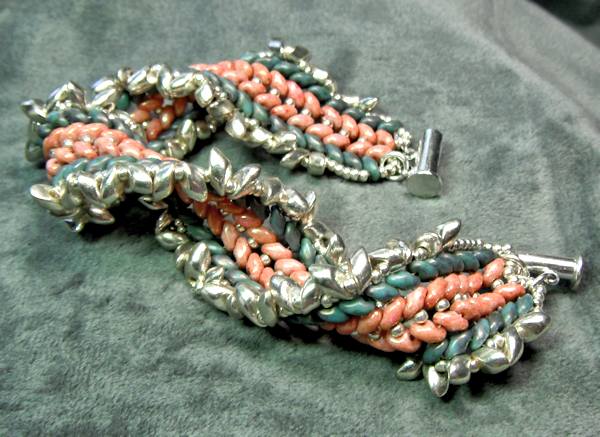
Double Herringbone Bracelet with Superduo Beads Tutorial
 How about another herringbone bracelet made with Superduo beads? This video tutorial shows you how to use these cool beads in a bracelet project that has you seeing double. 😉
I’m glad that I bought a whole bunch of the Superduo beads when I found them on sale, so I can continue making new projects!
What’s Double Herringbone?
Well, I probably just made up the title to fit this project. I call it double herringbone for two reasons.
- There are two columns of herringbone running lengthwise.
- There is a fringe that has a herringbone look to it.
In any case, it’s a fun project, and it actually does work up pretty fast. It’s more substantial than my original herringbone Superduo bracelet tutorial, so if you want something a little more eye-catching, this may be it for you. 🙂
Supplies and Video Tutorial
Of course, you will need plenty of Superduo beads for this project. The bracelet I made is about 7.5″, and it used about 20 grams of the beads. And another sun bead you’ll use is the 4x7mm magatama beads.
Click the video icon and it will expand to a normal size. Then click again and it magically begins playing. 😉
 As far as supplies go, you will need the following:
- 10 grams Superduo beads, Ruby Luster
- 10 grams Superduo beads, Copper Turquoise
- 12 grams 4x7mm Magatama beads, Platinum
- 2 grams size 11 seed beasds, permanently galavanized silver
- Clasp of your choice (I use a magnetic tube clasp in the video)
- 4 jump rings, 3.5mm inside diameter
- Thread of your choice (I am using One-G in the video in Beige)
- Size 11 beading needle (size 12 would also work)
- Scissors and/or thread burner
- Beeswax or micro-crystalline wax to make the thread “stickier”
I rarely use beeswax or other thread conditioners, but I found it to be necessary for this project. The Superduo beads get very slippery while you are doing the double row of herringbone. I tried it several times without using the micro-crystalline wax, then finally gave up and waxed my thread. Ahhh, success!  Just don’t use Thread Heaven for this project, because Thread Heaven doesn’t make the thread “grab” the beads.
I hope that you have enjoyed this video! Please go ahead and check out all the other neat projects and tutorials on this site…and get beading!