Beginning the End – Crimps, Guardians, Covers – Oh My!
Many people think adding the clasp is an end to their jewelry creation. That may be so, but the beginning of the end includes using crimps, wire guardians and crimp covers. These are what you can use to attach your jewelry to your clasp.
But…what are they and how do you use them? Read on, and learn what you need to know, then watch the video (below) to see it all in action.
 Wire Guardians
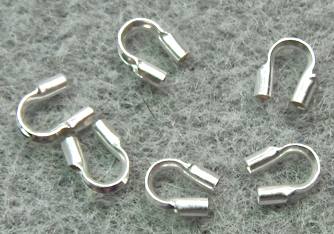
These are handy little items that help to prevent your wire from abrading, where it connects to the clasp. It looks like a horseshoe, and the wire travels up a short tube, over the top of the horseshoe, and then back down the other tube.
The inside of the horseshoe is what is in contact with the clasp, preventing abrasion to the wire.
I have also used these with beading thread such as Fireline, although if you do use beading thread, you’ll want to use a heavier thread and make more than one pass through the guardian.
Why use these with beading thread? Because when it comes time 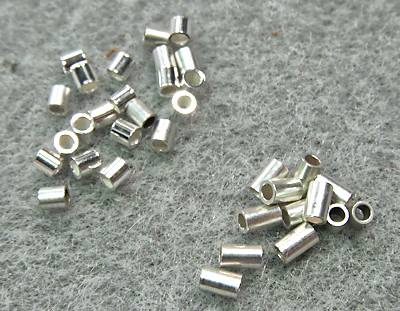 to add a jump ring to attach the clasp, the thread won’t slide out of the jump ring.
Crimps
Crimps are used mostly with beading wire, to fasten the beading wire to the clasp. Beading wire is made from ultra-thin strands of steel made into a thin cable, so you don’t just tie them like you would beading thread. Instead, you crimp the ends to hold the pieces of wire in place.
Crimps come in many different metals and several different styles. Shown in the photo are crimp tubes — teeny-tiny pieces of tubing. On the upper left are 2x2mm tubes and the bottom right has 2x3mm tubes. They are made from sterling silver.
You can also find them where they look more like a bead, or where they have a twist pattern. Since they all smush (technical term, LOL) flat and then into a skinny tube, I like to start with a plain tube. However, feel free to explore the various shapes!
 When you’re just starting out learning how to crimp, I suggest starting with copper crimps. They are softer than base metal, plus they are definitely less expensive than sterling silver!
Crimp Covers
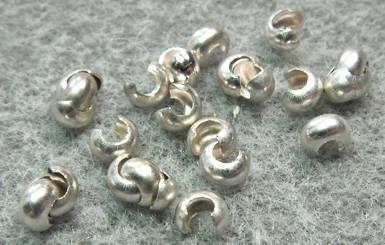
Most of the time, crimps aren’t folded absolutely perfectly. Crimp covers save the day by, as you may guess, covering the crimps!
They look like rounds beads with a bite taken out of them.
What happens is that the “bite” is what allows the magic to happen! Because you sandwich the cover around the crimp, then ever so gently move the ends of the “bite” together.
You’ll need to do this little by little, as you want the end product to look as much like a round bead as possible. And when you’re done, the crimps are hidden from view.
See Them in Action – Video Tutorial
Now that I’ve explained a little more about these handy findings that make your jewelry look more professionally finished, there’s nothing like seeing it all in action, right? Right!
So here’s a video tutorial for you. Click on the thumbnail image and it will expand to a larger size. Then sit back and enjoy!
Supplies Used:
- Beading wire (21 strand medium weight, 8 to 10 inches)
- Clasp of your choice (I used a sterling silver toggle clasp)
- Crimp tubes (Sterling silver, 2x2mm)
- Crimp Beads (Sterling silver, 3mm)
- Wire guardians (Sterling silver, .024 size)
- Beads (I used a mix of Swarovski pearls in 6mm and 8mm, crystal rondells 8mm, fire polished 4mm rounds, sterling silver 4mm)
- Miscellaneous sterling silver daisy spacers, bead caps
Right Angel Weave Tutorial 1 “Begin the Bling”
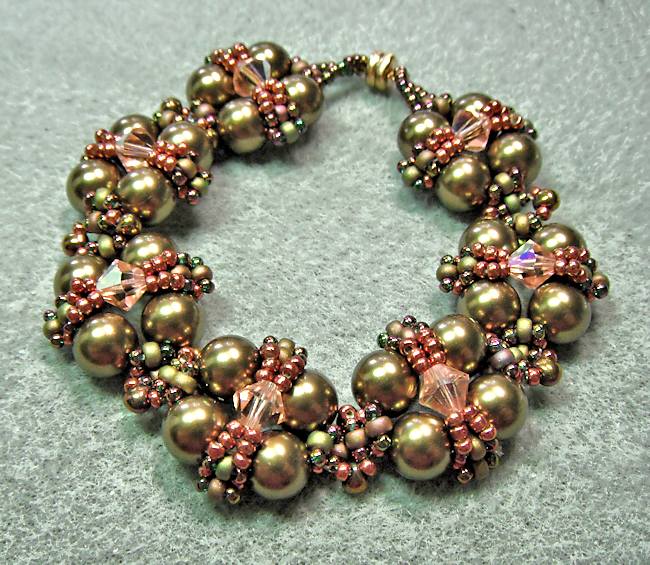 Right angle weave (“RAW”) is one of the most versatile beading stitches around! You can dress it up or down, use all kinds of bead sizes and make jewelry that stands out from the crowd!
Right angle weave is named because the beads in a unit sit at right angles to each other. The units can be as small as four beads, or as many as you wish (although the number is typically divisible by 4).
The Projects
There are four projects in this tutorial; they are:
Topical Seas: A bracelet in shades of seafoam and aqua, glistening with pearls. Some Swarovski crystals adds sparkle and shine.
Diamonds for Angel: One of the challenges of right angle weave is that thread often shows. Another is that units made with large beads can be unstable. Not with this bracelet — you’ll discover how to stabilize them…and also hide your thread at the same time!
Renaissance Flair:Â Large round beads are especially difficult to stabilize, but this bracelet proves that it can be done…and done with flair!
Triangulation: When’s a tube not a tube…when it’s a triangle! Tubular RAW takes a different shape with three sides. All by itself it’s kinds cool, but add some embellishments that emphasize the triangular shape and has an absolutely wonderful feel to it.
What Else?
While this tutorial assumes you have been exposed to right angle weave, in the appendix there are step-by-step instructions and photos on how to do RAW.
And speaking of in structions and photos — there are 45 pages and 98 photos! The photos are close up, so you can see exactly what you are supposed to do.
Note: This book is in PDF form, and is only available by downloading. However, you get this ebook immediately after purchasing — you will see a link on your invoice, and you’ll also get an email with the same link. The file is about 2 MB in size.
So, here is the ebook tutorial on RAW, with lots of friendly instruction and plenty of pictures. 🙂
To get this ebook digitally delivered (i.e., you get it immediately), simply click the “Add to Cart” button. It’s just $10.
I do my best to over-deliver, so I think you’ll be pleased — not to mention on your way to creating some gorgeous right angle weave jewelry!
Tassel Pendant Tutorial
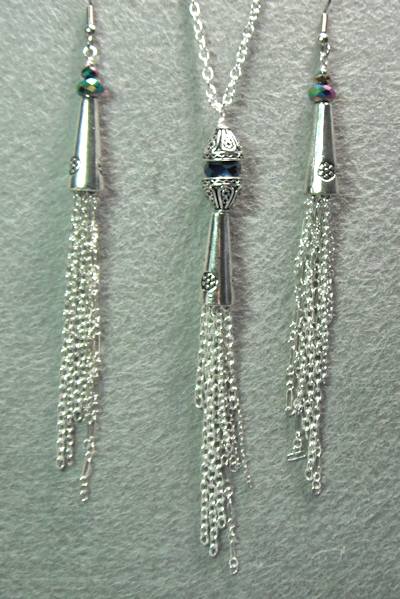 Tassel pendants are fun to create, and if you don’t know how to make one, this tutorial is for you! They are quick and easy, so if you need something to wear and you only have 15 or 20 minutes in which to make it, you’ll enjoy this project.
This video tutorial demonstrates how to make the pendant that you see on the right. You can use the same technique to make earrings, too!
Tassels Have Movement
One of the fun properties of tassel jewelry is that it moves! The movement catches the light and adds a great deal of interest.
Tassels can also be used in various ways. You can take the information in the video and use it to create jewelry of all kinds, as well as decoration around the house! Think of fan pulls, swags for drapes…all kinds of things.
Mix it Up!
I’ve demonstrated using silver colored metal, but you can use any colors you wish. Silver, gold, copper, brass, gunmetal…the list goes on and on. You can mix metals as well for an even different look!
 Tassel Tutorial
So, here is what you will need for the pendant in the tutorial:
- One bead cone
- Two bead caps
- One fire-polished rondel bead, 8mm.
- Approximately 24 inches of chain, cut into pieces between 1 inch and 3 inches long each.
- Piece of wire, 22 gauge, about 3 to 4 inches.
- Necklace chain to use for hanging the tassel pendant around your neck.
(If you want to make the silver earrings, you need 2 cones, 4 fire polished beads (two of each, 6mm and 3mm), 2 pieces of wire, double the chain and two earring findings.)
When you’re done, you can check out some of my other tutorials, like the memory wire bracelet, quick dangle earrings or how to make wrapped loops and eyepins. You can check out the projects page, too, if you want to try your hand at some intermediate and advanced beadwork projects.
